Pain a L’Ancienne

M & I only have a few more days till our big move! Our plans have changed a little though. The docs have really restricted my activity & traveling, so our trip to Texas had to be cancelled :(. Instead, we’re heading straight to San Diego to be close to my new doctor.
We have a very busy weekend ahead! I want give a big thank you to Samantha for her fabulous guest post!!
~~~~~~~~~~~~~~~~~~~~~~~~~~~~~~~~~~~~~~~~~~~~~~~~~~~~~~~~~~~~~~~~~~~~~~~~~~~~~~~~~~~~~~~~~~~~~~~~~~~~~~~~~~~~~~~~~
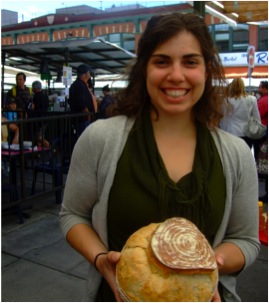
Hello Weekly Bite readers! I’m Samantha and I blog about food, fitness, and body image at Bikini Birthday. When I’m not pumping iron or eating, you can find me in my kitchen making homemade bread.
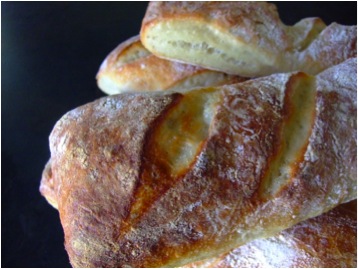
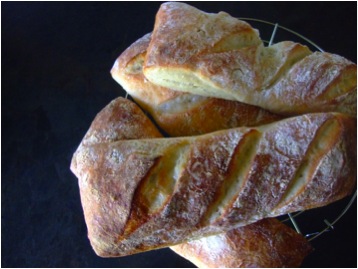
I’m amazed how four simple ingredients (flour, water, salt, and yeast) can make such flavourful bread. This recipe that I want to share with you is one of my favourites. It’s a rustic Pain a L’Ancienne that looks and tastes like the fancy artisanal bread that you can buy from specialty bakeries. I promise you that this recipe is very hands off, very easy, and very delicious!
Allot yourself 2 days to make this bread. Most of the work is done by your fridge which provides a cold, slow fermentation overnight to give the bread optimum flavour.
Pain a L’Ancienne
Recipe from Peter Reinhart’s Bread Baker’s Apprentice
Makes 8 mini loaves
Ingredients
- 27 oz (6 c) Bread Flour (or all purpose if you don’t have bread flour)
- 2 ¼ tsp salt
- 1 ¾ tsp instant yeast
- 19-24 oz ice cold water
- Semolina or cornmeal for dusting
Directions
Combine all the dry ingredients together. Then slowly add the ice cold water. If you are using an electric mixer, use the dough hook and mix on medium speed for 5-6 minutes. If you are using your hands, keep a bowl of cold water nearby to wet your hands (this dough is sticky!).
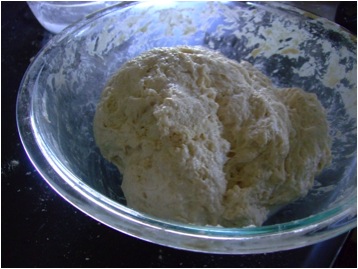
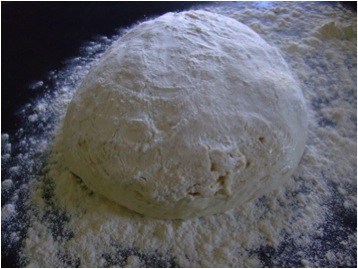
When all the ingredients are incorporated, the dough should be slightly sticky to the bottom of the bowl but clear the sides. If not, add extra flour or water as needed. When ready, the dough will look like this:
Oil a very large bowl and transfer the dough to the oiled bowl using wet hands. No Kneading Necessary! Cover and refrigerate overnight.
Remove the dough from the fridge and leave it on the counter to come to approximately room temperature before you begin baking.
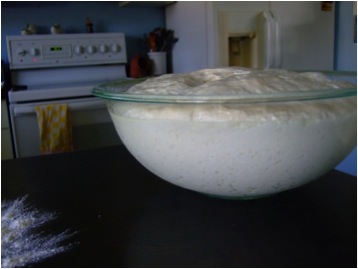
You want the dough to be double in size from the day before, which usually takes more than 8 hours in the fridge. I like to make the dough in the morning and refrigerate it for 24 hours until the next morning to get optimal fermentation. If you make the dough at night and refrigerate for 8 hours, the dough may need to finish rising out of the fridge the next day.
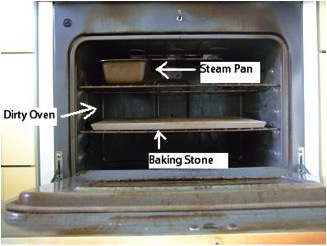
When you are ready to work with the dough, preheat the oven to 500*F. If you have a baking stone then place it in the centre rack of the oven. Also place an empty loaf pan in the oven which will be used as a steam tray.
Sprinkle the counter very, very liberally with flour (remember this dough is sticky!) and transfer the dough onto the counter carefully, trying your best not to release the air pockets that have formed. Sprinkle the top of the dough liberally with flour as well.
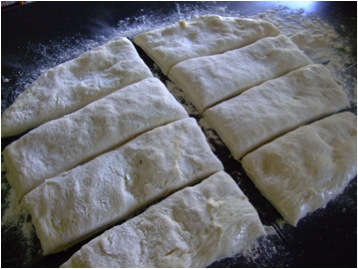
Stretch the dough into a large 8”x8” square. Using a bench scraper cut the dough in half and then cut each half into 4 pieces.
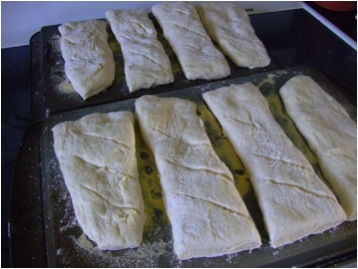
Take 2 baking sheets and flip them upside down. Sprinkle them liberally with semolina or cornmeal. Transfer each mini loaf to the baking sheet, lightly stretching the dough to the width of the baking sheet as you do so. Score the loaves with a sharp razor or serrated knife.
If you have a baking stone, slide 4 loaves off of the back of the baking sheet onto the stone (as if it were a pizza peel) and bake 4 at a time. Otherwise, you can place bake the loaves right on the baking sheets 8 at a time.
One the loaves are in the oven, pour 1 cup of water into the steam pan. Pour a little bit of water on the oven door as well, then shut the oven door immediately. Wait 30 seconds. Pour a little more water on the oven door and then shut the door immediately once again. (Doing this helps the crust to crisp up slightly)
Turn the oven temperature down to 475*F. Bake for 10 minutes, the rotate the loaves 180 degrees and bake for another 10 minutes until the loaves are golden brown.
Transfer the loaves to a cooling rack for about 20 minutes before indulging. With a slightly crisp crust and a soft chewy crumb, these loaves are amazing for sandwiches and even better with just a little bit of butter. Enjoy!




Thanks for letting me guest post for you Estela! You know I love your blog.
The bread looks fantastic!
I hope you have safe travels to SD, Estela.
samantha, great recipe!
estella…good luck with the move and if you need a GREAT Ob in your immediate!! area in San Diego, I have a wonderful rec. for you, just in case as backup if you need one.
I can’t wait to bake this weekend now! 🙂
I met Peter Reinhart when I was at culinary school and he came and did a demo at my school. He is an amazing teacher and chef. I so want to make this bread. It looks delicious!
Sending you lots of love and positivity, E!
Samantha, What a great step-by-easy-step account of how to bake bread. It really is simple, isn’t it? Simple ingredients and simply rewarding to make. A little time involved but it’s so worth every bite.